


Sunday, October 31, 2010
Saturday, October 30, 2010
We are Ready...
The ghost lanterns are lit...

I'm sure you've seen these before. I found this idea all over blogland. It's just emptied and cleaned milk jugs with white lights through a cut hole in the back.
The pumpkin is carved...

The ladybug believed the pumpkin was going to be full of candy. Boy, was she surprised when she stuck her hand in and felt "slime." The little guy didn't care for the "slime" much either. We all got passed it.
The candy is prepped...

Candy. The best part of Halloween. The ladybug has a peanut allergy. I feel bad that she has that little obstacle to deal with on a day all about candy. Thanks to some inspiration from others, I think I know how we are going to deal with it... next post I'll let you know how it worked out!
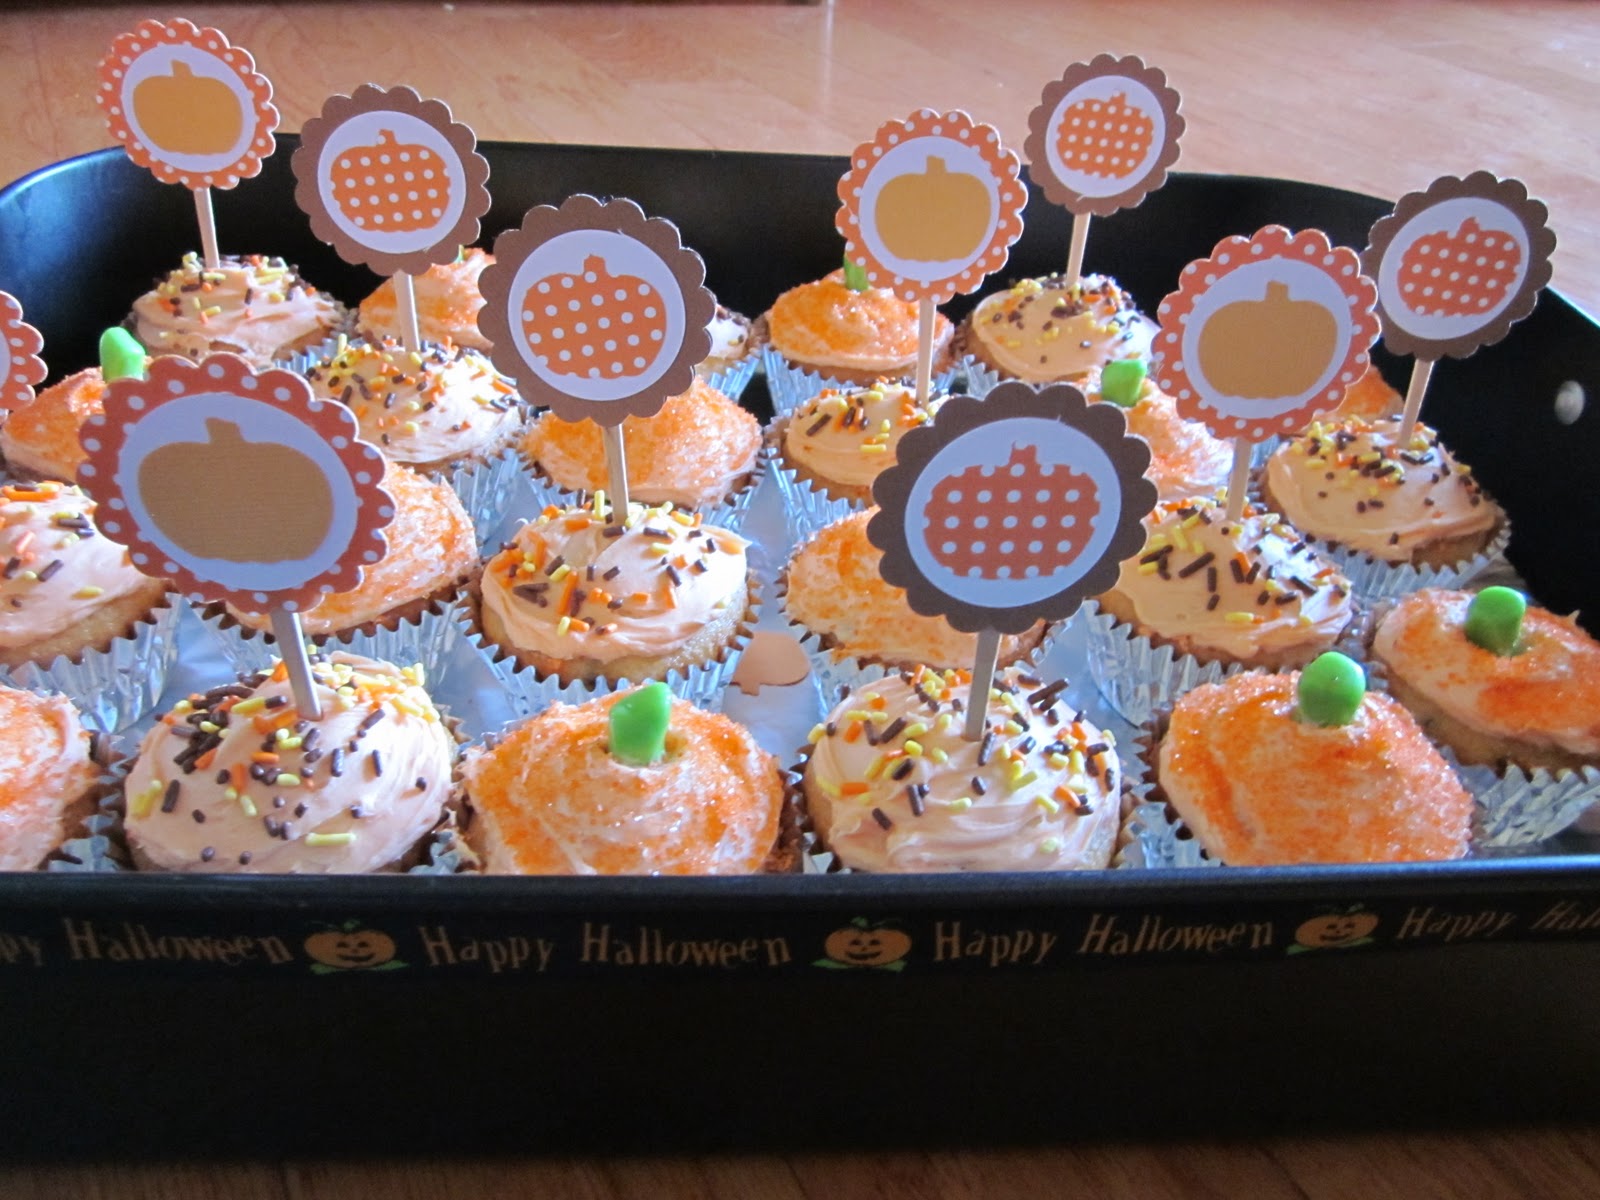
Pumpkin Cupcakes
Ladybug had her fall party at preschool on this week, and I was signed up to bring the cupcakes. Remember these apple cupcakes that I made last month?
Well I made these "pumpkin" cupcakes the same way I made those apple cupcakes.

Some I just topped with sprinkles and cupcake toppers from my etsy shop.

The I needed to find a way to transport these without smooshing down all that cuteness. This led me to finally find a good use for my roasting pan. (I don't think I've ever actually used it in the oven.)

It was the perfect height for protecting the cupcakes.

I prettied up the pan with ribbon around the edge,

and wrapped ribbon around the handles.
It worked out perfectly.

I had one happy cowgirl!

Have a fun and safe weekend!


Friday, October 29, 2010
Thanksgiving Countdown of Gratitude
Our November countdown is finished, and just in time.
Ta-da!

When I first saw this tutorial at Jellybean Junkyard I knew I was going to make one.
The idea is for each family member to come up with something they are thankful for each day in November. Write down each persons response on the card for that day. You can write on the back of the cards next year, or just add another card to the pocket. I love that it encourages our family to be grateful, and it's a nice way to preserve memories.

Jellybean Junkyard gives a great tutorial for this board. It can be a bit time consuming with all the cutting and gluing, so if you have little ones and want to do this...plan yourself a lot of time this weekend to work on it. It is easy to make, but time consuming. It is worth the result though!
 |
| (all the pretty fall papers I used to cover the pockets) |
The only big difference in mine is that I used small craft bags to make the pockets instead of coin envelopes, since that's what I had. After cutting them down my pockets were about 3" x 2.5". Hers are a bit bigger.

The only thing I had to buy was the piece of plywood. The nice people at Home Depot cut it down for me to 24" x 20". It cost around $8. The fall scrapbook papers I had collected over the last couple months, and the numbers and title I cut on my Cricut.
 |
| of course, I had to throw a cork one in there. |
I followed the tutorial step by step. If your interested in making one just head over there for all the details.
Linking up with


Thursday, October 28, 2010
Catwalk Features no.2
Thank you to everyone who linked up on Tuesday!
Here is a little of the inspiration that was shared...
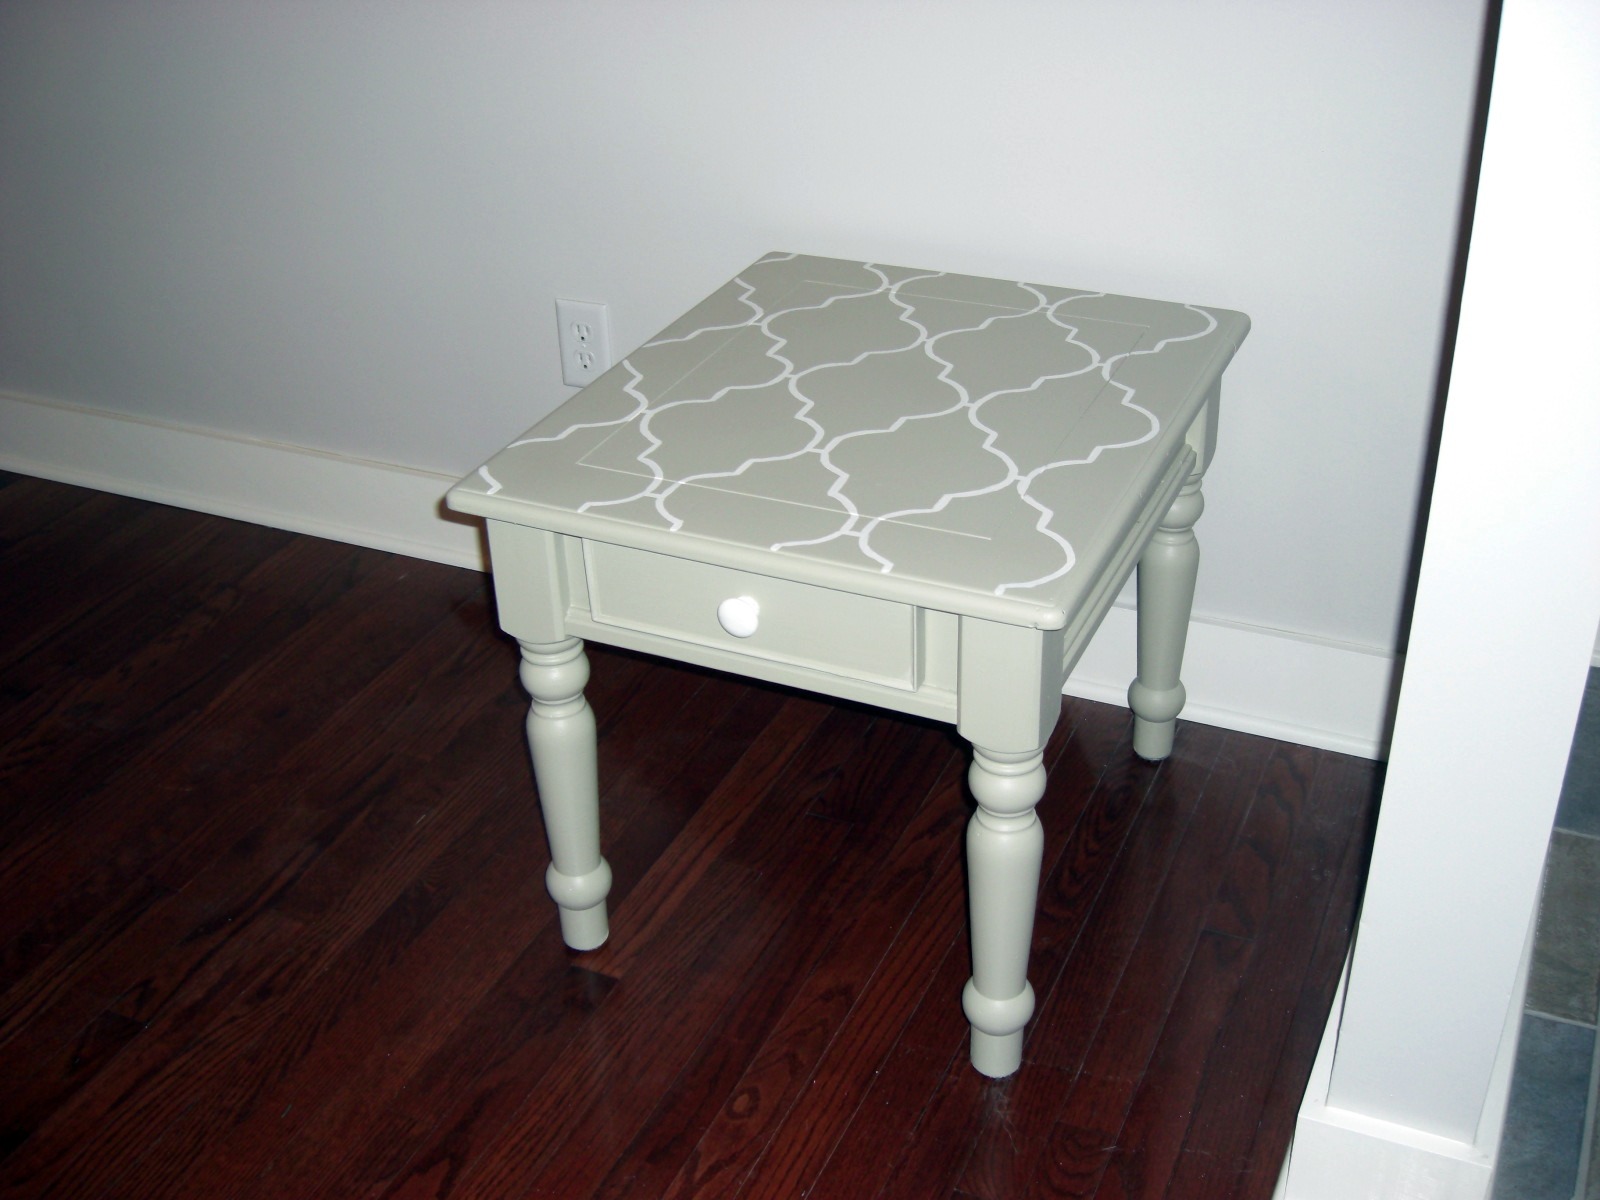
Laurie at House to Your Home transformed an old side table into this cutie
Jennifer at Muse Lodge made this Halloween art with her own colored newsprint.

Timbra at La-de-la-de-da turned her fun rock creations into story telling

Kathleen at Fireflies and Family share a creative Halloween tradition

If you were featured, grab yourself a button!

Come back next Monday night and link up your crafty creations!
Wednesday, October 27, 2010
Silhouette Tags
I am STILL working on our Thanksgiving countdown. I had hoped to post that today. Hopefully tomorrow or Thursday it will be done, and then I can share that with you.
So, for today I am sharing some fun little Christmas tags I started working on. I knew that If I didn't start now, they would not get done.
I made the silhouettes of my munchkins using the same method I used here.

I have an oval cutter that I used on some Christmas paper to make the background.
I just attached them to the pretty little scallop tag and added a ribbon. Done.

I like them.

Linking to


Subscribe to:
Posts (Atom)